IoT101 Lesson2 Finger Robot
Since in the previous article we already managed to light up the built-in LED on the ESP8266, it means our development environment is working. Today we’re going to try something a bit more hardcore: build a “physical plug-in” that remotely presses the power button on our computer.
Getting Started with ESP IoT Development: Finger Robot
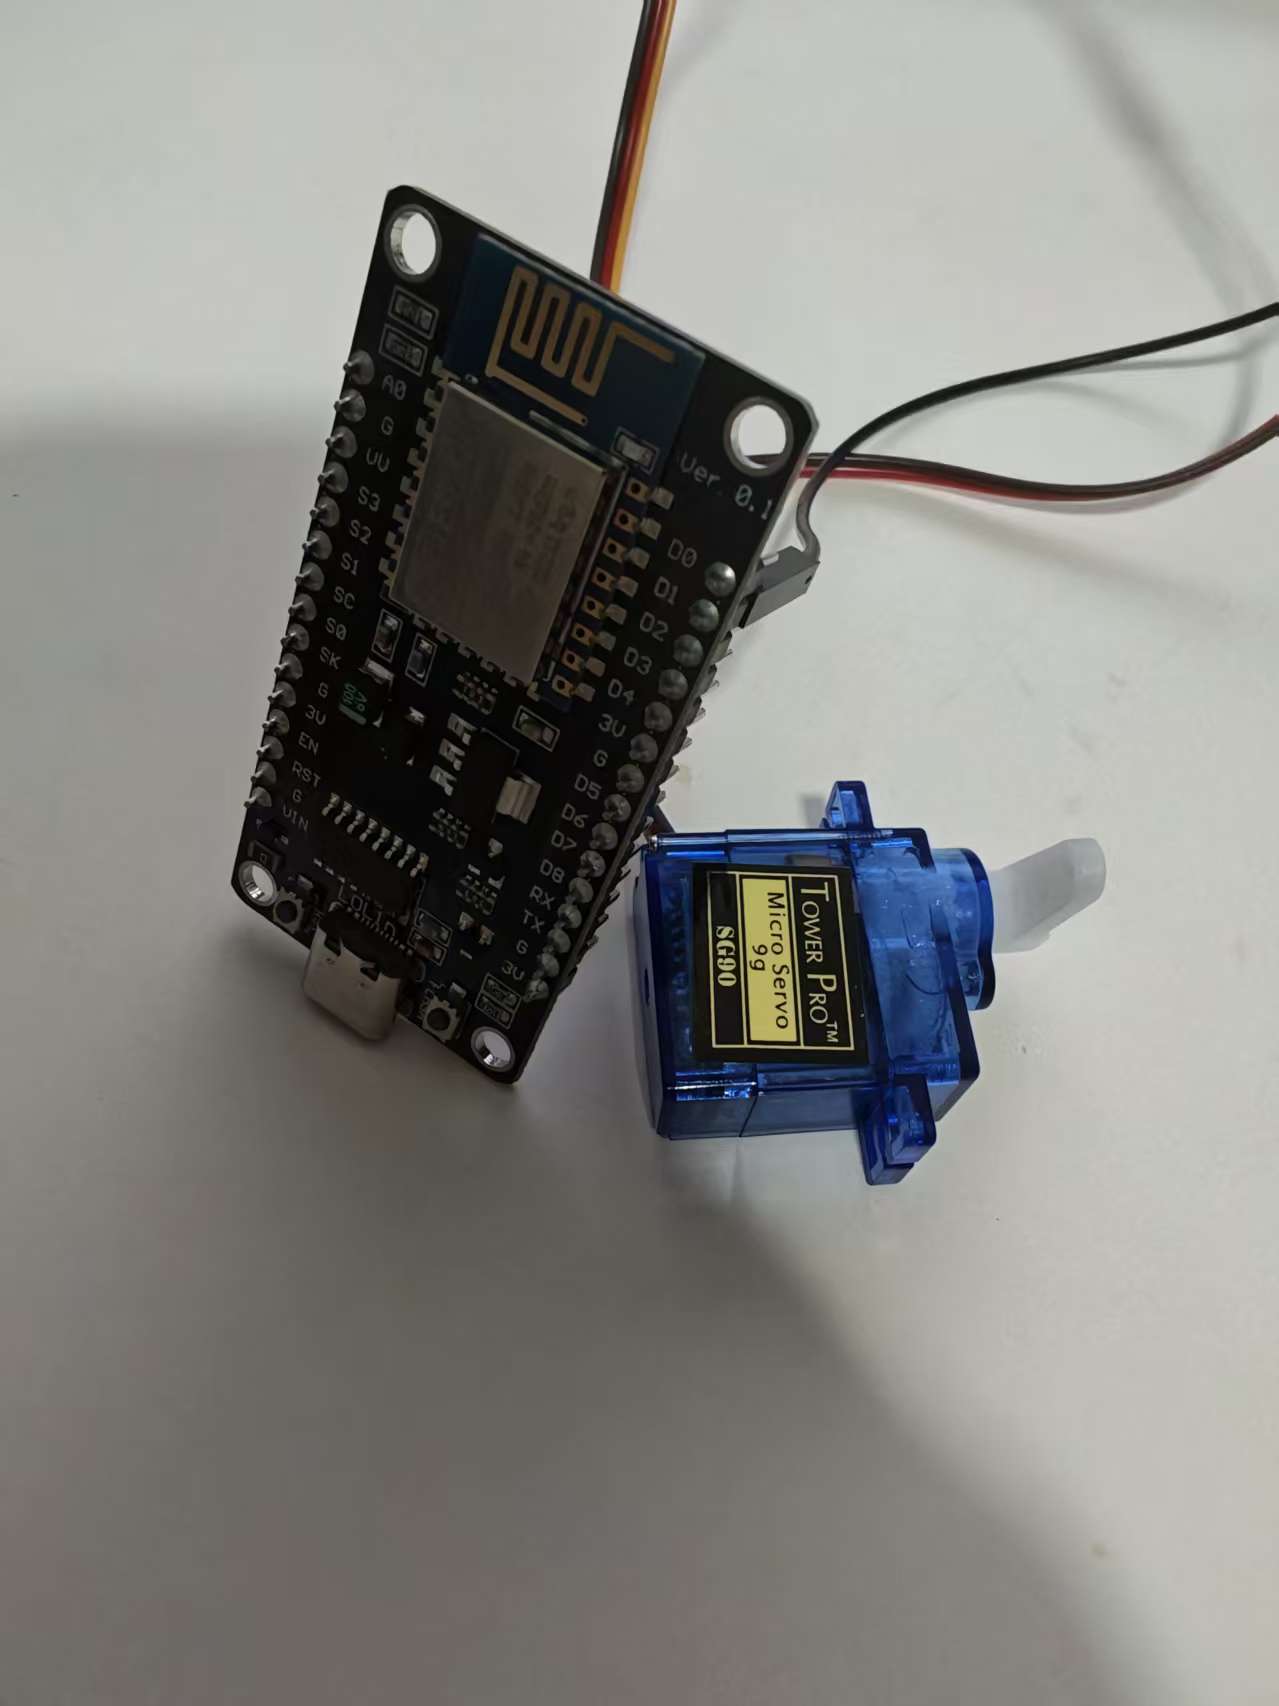
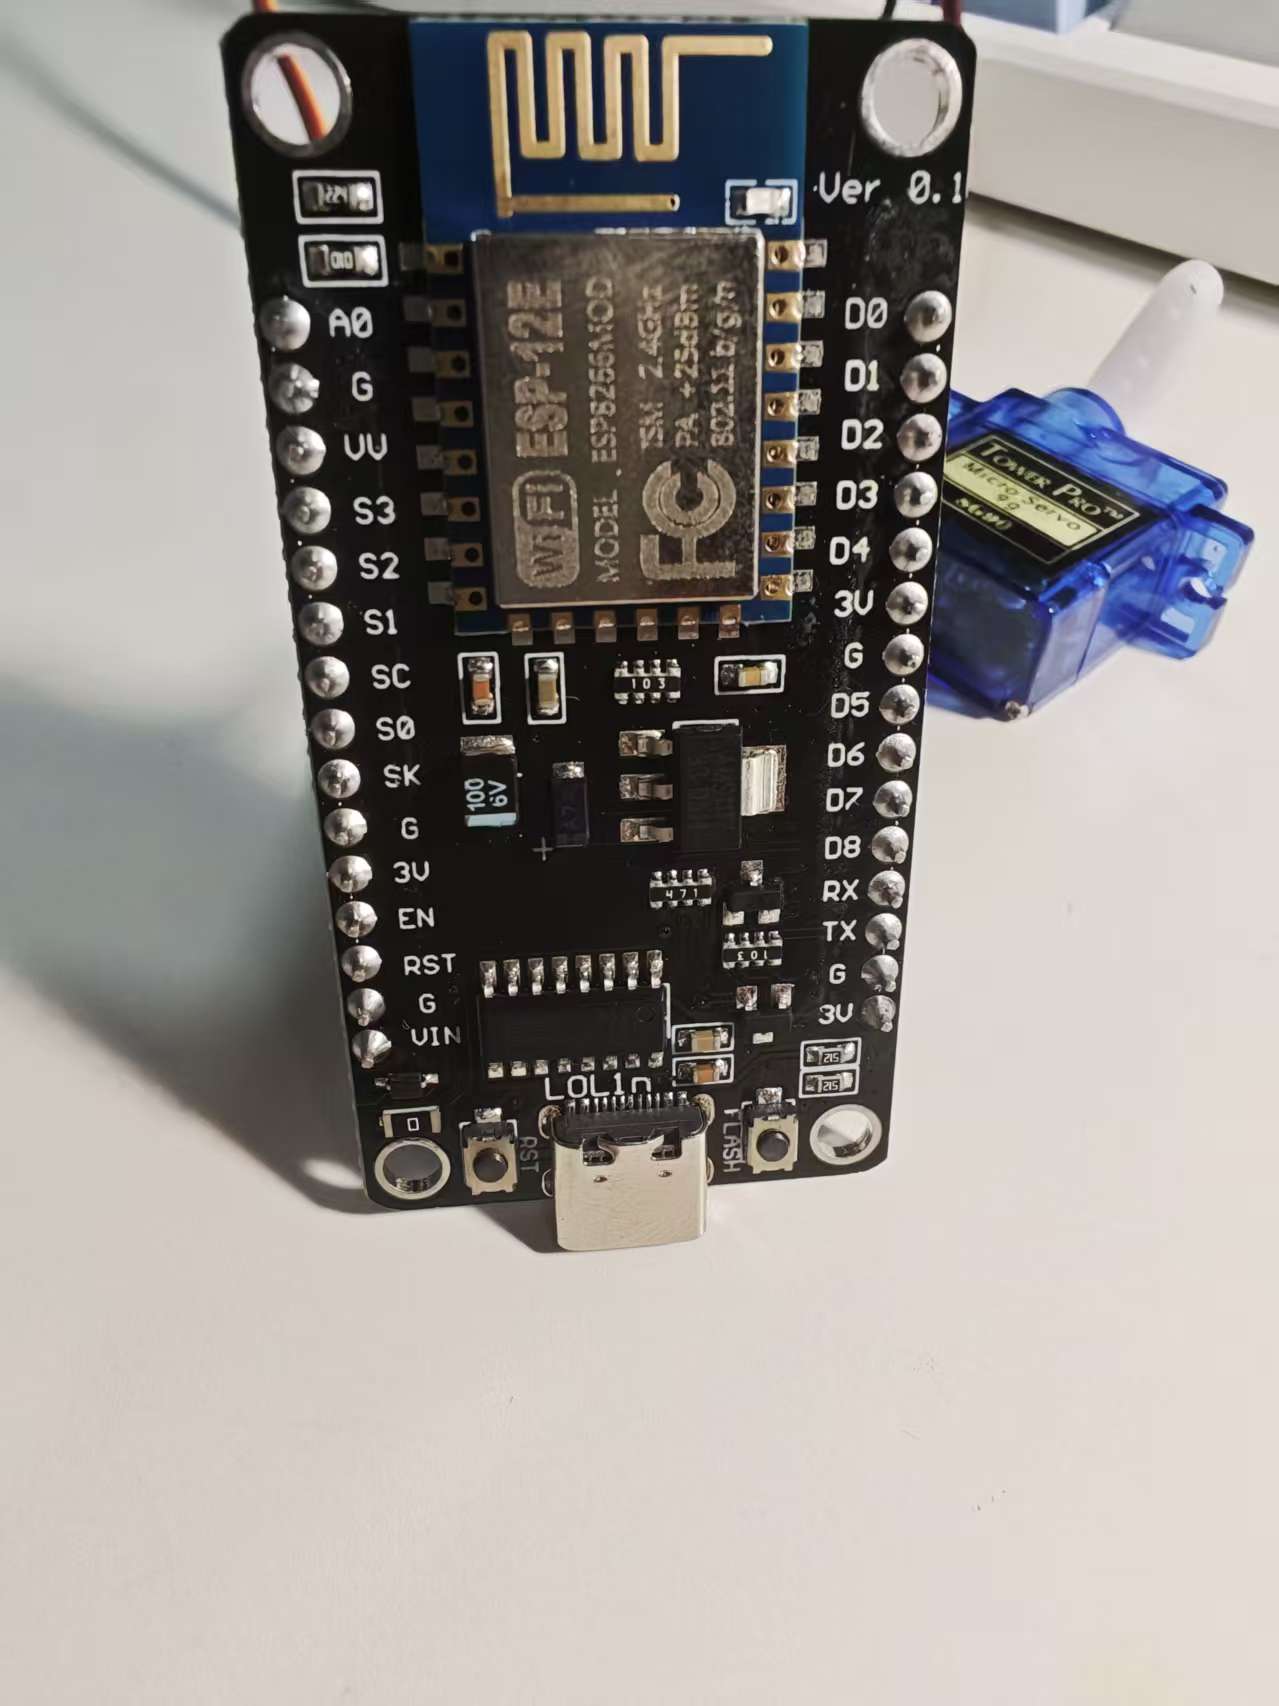
The main character this time is still the king of cost-performance: the ESP8266 (NodeMCU), paired with a servo motor that costs about $2 with free shipping.
1. Hardware “Starter Pack”
Besides the NodeMCU from before, you’ll need:
- SG90 Servo: The small blue servo works perfectly. It has enough torque to press a computer button.
- Jumper wires: 3 pieces (male-to-female).
- Double-sided tape / mounting putty: Used to stick the servo onto the computer case.
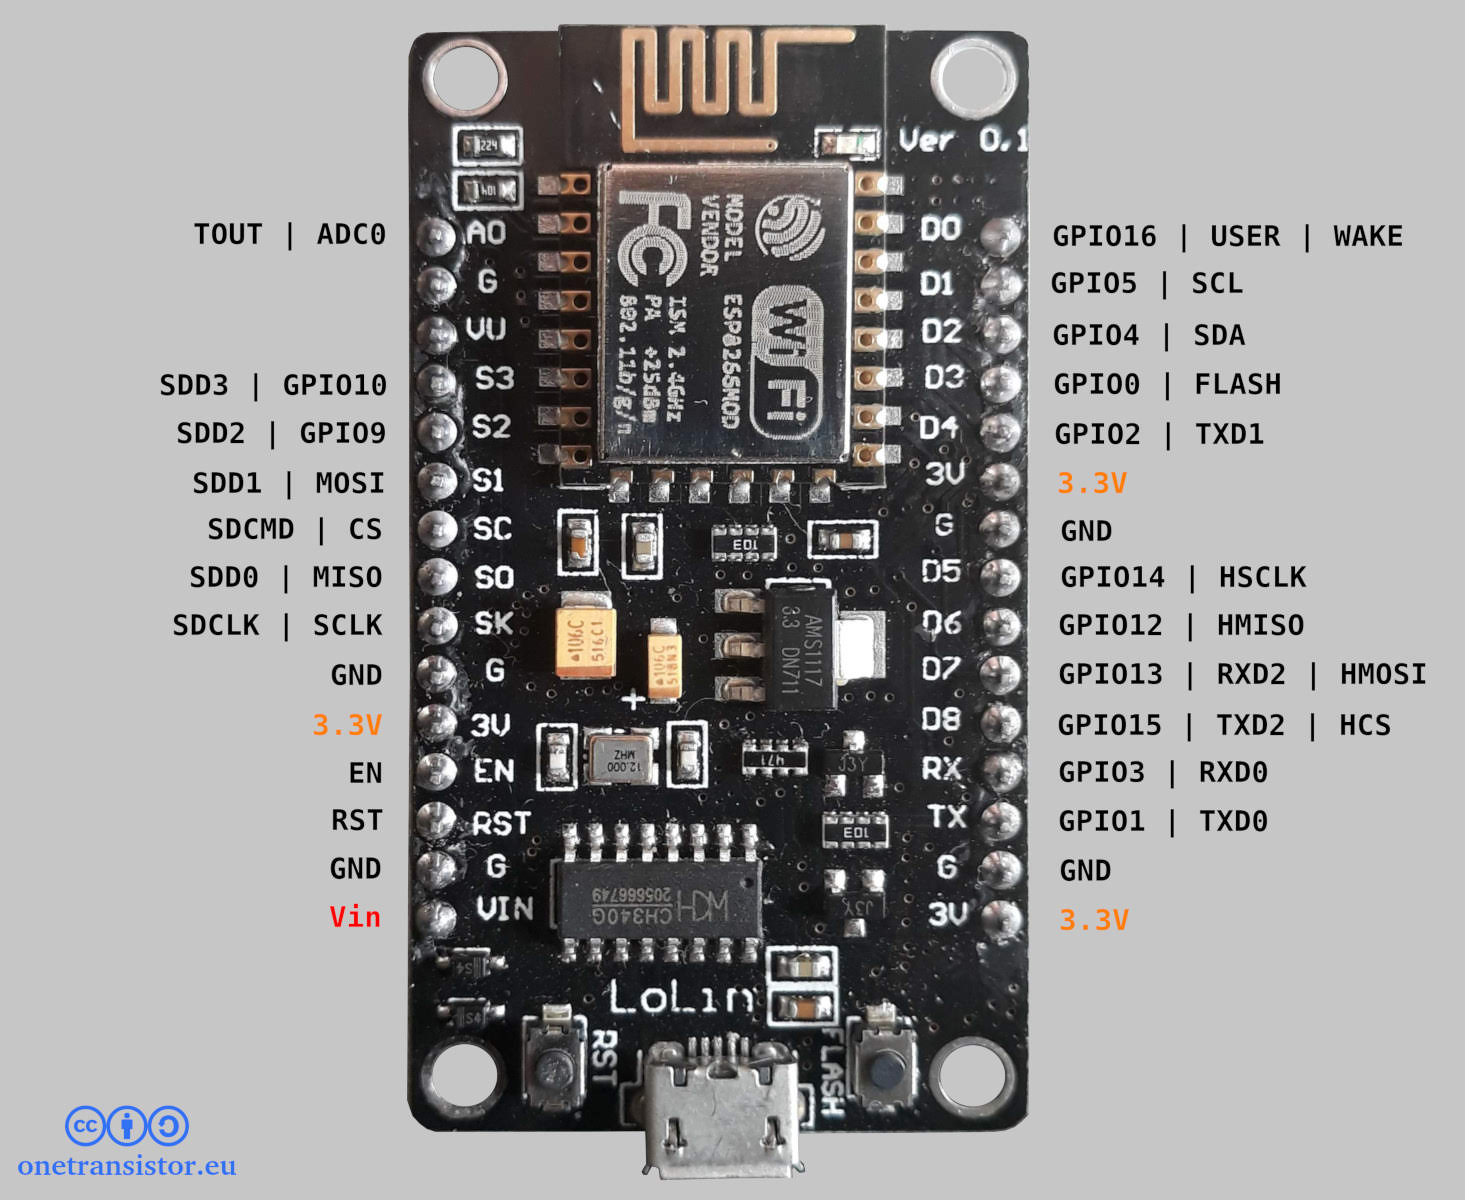
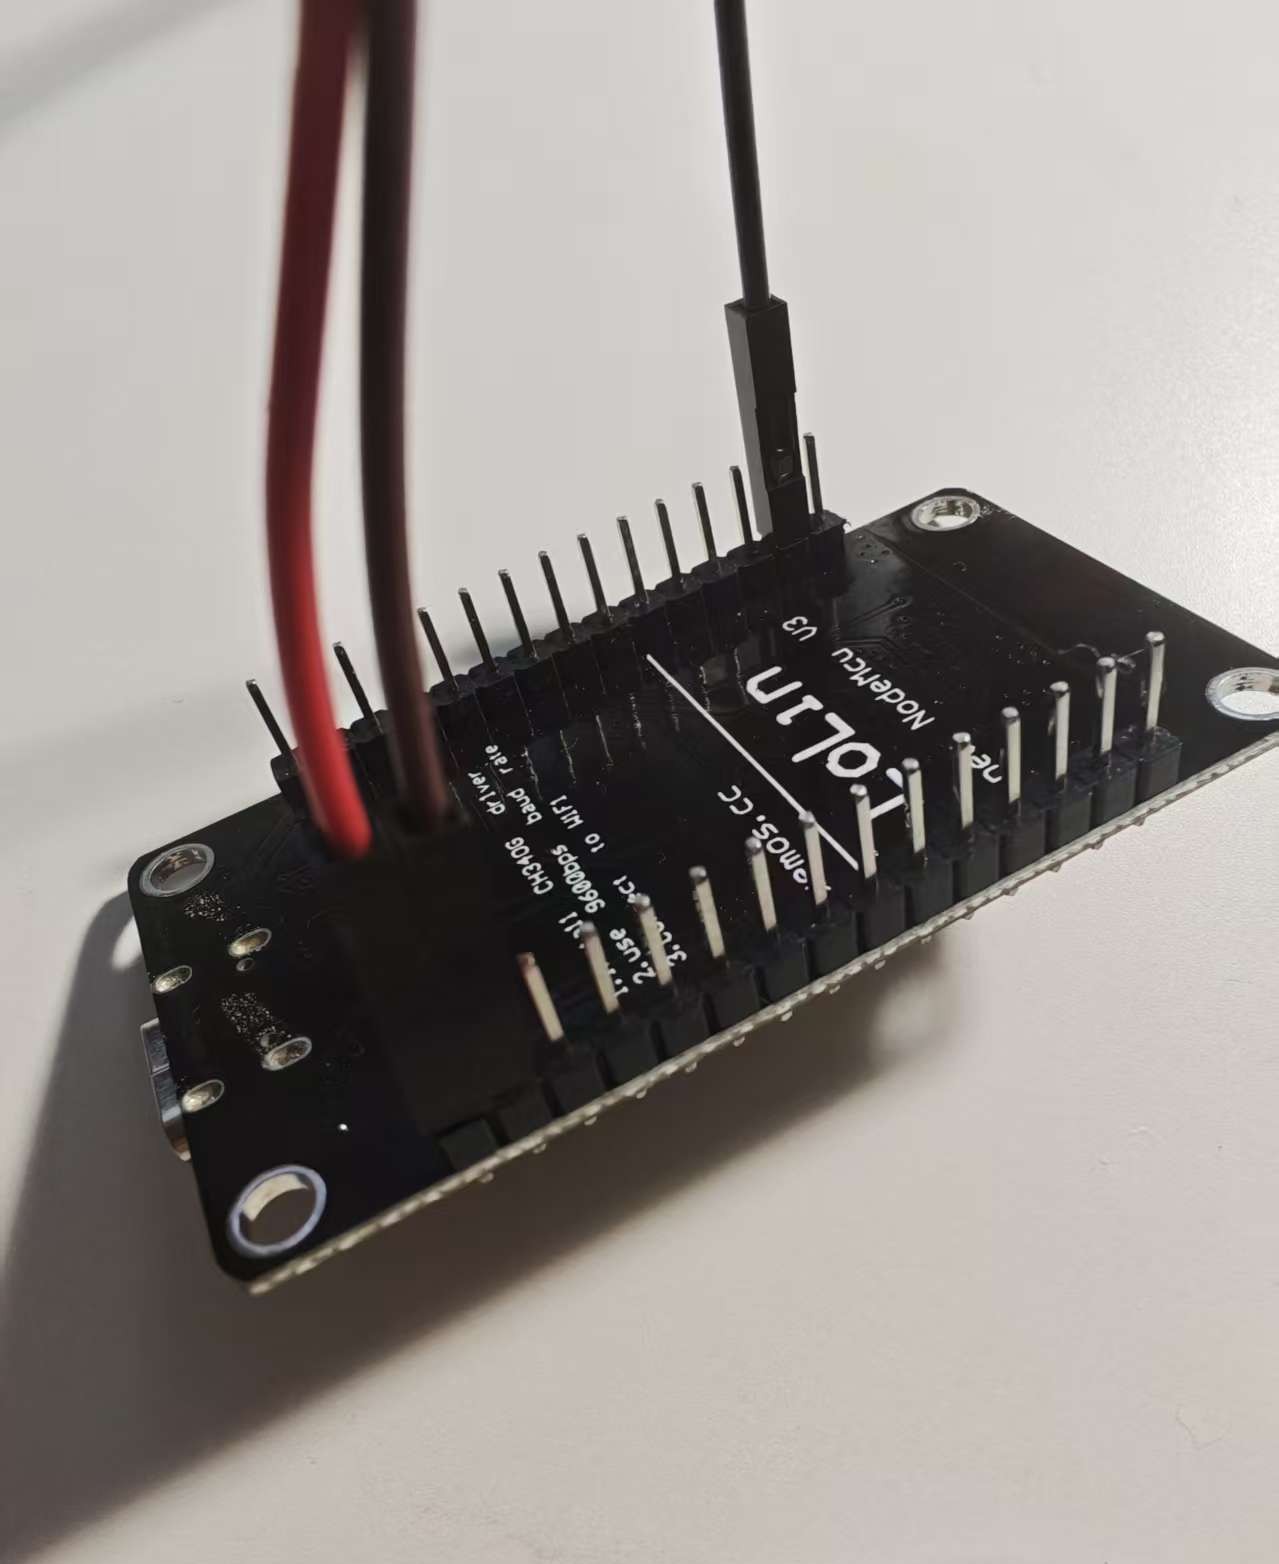
2. Wiring Diagram: Don’t Connect It Wrong or It Won’t Have Enough Power
A servo has three wires, and their colors are usually standardized:
Brown (Ground): Connect to the ESP8266 GND.
Red (Power): Connect to the ESP8266 VIN pin
(Note: VIN outputs the USB’s 5V voltage. If you connect the servo to 3.3V it might not move. My VIN pin actually had a cold solder joint and had no power, but in practice 3.3V still managed to drive it.)Yellow (Signal): Connect to D1 on the ESP8266 (which corresponds to GPIO 5 in code).
The wiring looks like this:
3. Prepare the “Remote Control”: Blinker
Before writing the code, download the Blinker app from your phone’s app store.
- Open the app and tap Add Device → Standalone Device → Network Access.
- Copy the Secret Key shown there. You’ll need to paste it into the code later.
- In the device interface, add a Button component and change its component key name to
btn-abc(you can choose your own name, but it must match the code).
4. Writing the Code (ESP8266 Version)
Paste the following code into Arduino IDE. Remember to replace the Secret Key, WiFi name, and password with your own.
#define BLINKER_WIFI
#include <Blinker.h>
#include <Servo.h>

// 1. Replace with your own information
char auth[] = "Your Blinker Secret Key";
char ssid[] = "Your WiFi name";
char pswd[] = "Your WiFi password";

Servo myServo;
BlinkerButton Button1("btn-boot"); // This name must match the “component key name” in the app

// 2. Servo action function: press down -> wait half a second -> return
void servo_callback(const String & state) {
    Serial.println("Command received, preparing to power on!");

    myServo.write(60);  // The angle for the “finger” pressing down (adjust this number if needed)
    Blinker.delay(500); // Pause for 0.5 seconds to simulate a real press
    myServo.write(0);   // Return the “finger” to its original position
}

void setup() {
    Serial.begin(115200);

    // Signal wire connected to D1 (GPIO 5)
    myServo.attach(5);
    myServo.write(0); // Initial state: finger retracted

    // Initialize Blinker
    Blinker.begin(auth, ssid, pswd);

    // Bind the button to the function
    Button1.attach(servo_callback);
}

void loop() {
    Blinker.run(); // Keep the device online
}
5. The Soul of the Project: Tape Engineering
After uploading the code successfully, you’ll notice that pressing the button on your phone makes the servo rotate once. The remaining work now becomes a bit of mechanical engineering:
- Find a suitable spot and use double-sided tape to attach the servo to your computer case.
- Adjust the servo arm angle so that when it rotates down, it presses the power button, and when it returns, it doesn’t block the button from popping back up.
- Power supply: Just use any phone charger to power the ESP8266.
6. Pitfall Tips
- Servo jitter: If the servo keeps making a “buzzing” sound or shaking, it’s usually because the current isn’t enough. Try using a better 5V/2A charger.
- Cannot connect to WiFi: The ESP8266 only supports 2.4 GHz WiFi. If your router combines 2.4G and 5G into one network, it’s best to split them; otherwise it might fail to connect.
- Disconnections: The free version of Blinker sometimes has delays, which is normal. Also note that if you power the ESP8266 through your computer’s USB port, once the computer shuts down the USB port usually stops supplying power as well (unless your motherboard supports USB power while powered off).